Inspector
The Inspector is contextual — it shows the settings for whatever is selected in the Outliner, and swaps its whole layout for an art layer, a structural node, or a raster track.
Selecting a vector art layer shows, top to bottom:
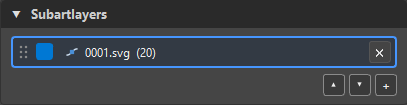
- Subartlayers — the track stack for this art layer. Each row carries a drag handle (reorder by drag), an enable box, the icon of what the track is —
 vector or
  bitmap — the sequence name with its frame count, and ✕. ▲ ▼ reorder, + appends another sequence as a new track. See multi-pass.
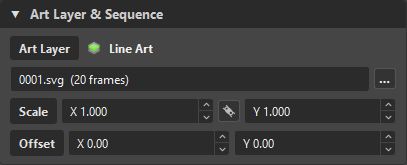
 - Art Layer & Sequence — which art layer (with its icon), the sequence file(s), and the Scale / Offset that ride on the art layer's vector. The link button keeps X and Y scale together.
-
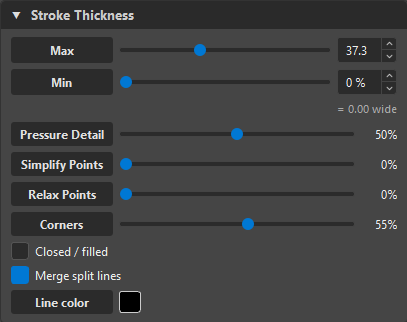
Stroke Thickness — Max / Min width, Pressure Detail, Simplify, Relax, Corners, plus Closed / filled, Merge split lines, and Line color. See Stroke Thickness & Pressure.
Line color and Fill color show what the source brings. One colour is a flat swatch; several are stripes of the source's own colours, and the hover counts them — 2 line colours, 3 fill colours in the source - 4 new swatches in palette 'X' on Apply. Left untouched, every colour becomes a swatch in the palette the drawing points to, on Apply. Click to point all lines or fills at one colour; right-click restores the originals. The Fill row only appears when the source has fills.
-
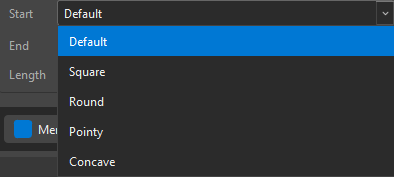
Tip Taper — shape the free ends only: Default, Square, Round, Pointy, Concave, per end, with a Length. See Tip Taper.
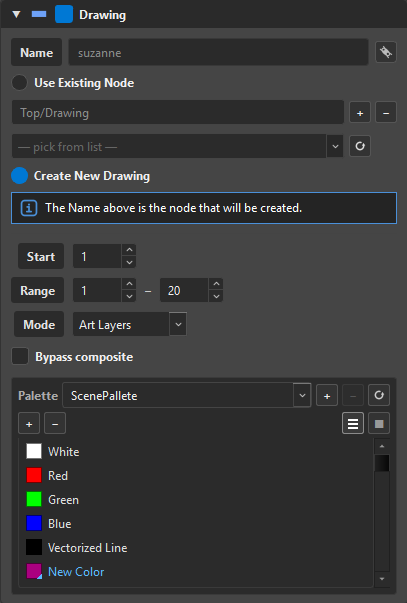
The Drawing card is the drawing's identity in the scene — and its palette:
- Name — the node's name; the link button binds it to the peg / group / composite names so they rename together (
suzanne,suzanne-P,suzanne-G,suzanne-C). - Use Existing Node — write into a Read node the scene already has: type its path (
Top/Drawing), pick it from the list, or ↻ to re-read the list. Create New Drawing — the Name above is the node that will be created. - Start — the first frame the sequence lands on. Range — which frames of the sequence to import. To continue an import that stopped (frames 1–100 already in, 101–200 to go), give both the same number:
Start = 101,Range = 101–200. See Resuming a long import. - Mode — Art Layers (the art goes into the four art layers, each a stack of tracks) or Original Bitmap (the drawing is one flat bitmap, flattened from the Recipe layer; vector tracks never enter it, and the other three layers are struck through in the Outliner). See Bitmap Import.
- Bypass composite — the drawing renders past the composite it would feed (it bubbles straight up to the parent). See Hierarchy.
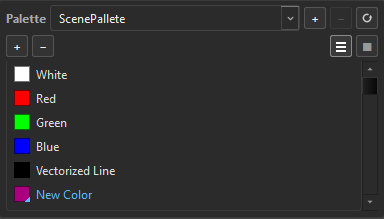
- Palette — the palette the import writes its colours into: pick one of the scene's palettes, or type a new name — + registers it as an app palette that becomes real on Apply; − drops an app palette; ↻ re-reads the scene's list. The field left empty means a palette named after the drawing.
- The colour list under it shows the palette's colours — the scene's (read-only, from Harmony) and the ones created here, in blue. + creates a colour (born black, rename it inline; double-click to recolour), − deletes selected app-created colours, and the two buttons on the right switch the list between names and swatches. A colour the import needs that the palette does not have is created on Apply; an existing colour with the same RGBA is reused, never duplicated.
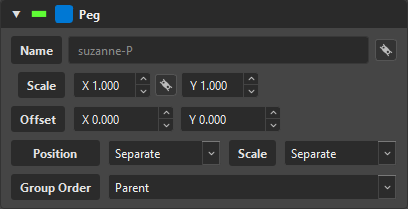

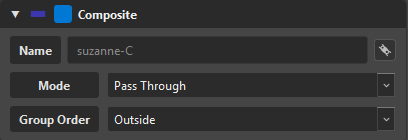
Each structural node is a section with a checkbox: tick Peg, Group or Composite on a drawing and OVB emits that node around it on Apply; untick Drawing to make a pure container. The composed icon at the top of the card — the same one the Outliner row shows — says which of the four are on (see the icon legend).
- Peg — Name, Scale X / Y (linked or free), Offset X / Y, Position and Scale mode (Separate or Parent), and Group Order (Parent / Child — only alongside a Group). The whole-drawing transform rides here: the green gizmo.
- Group — a Name; the linkable name row keeps it in step with the drawing.
- Composite — Name, Mode (Pass Through and Harmony's other composite modes) and Group Order (Outside / Inside a Group).
A raster track swaps in the content type choice and the trace controls:
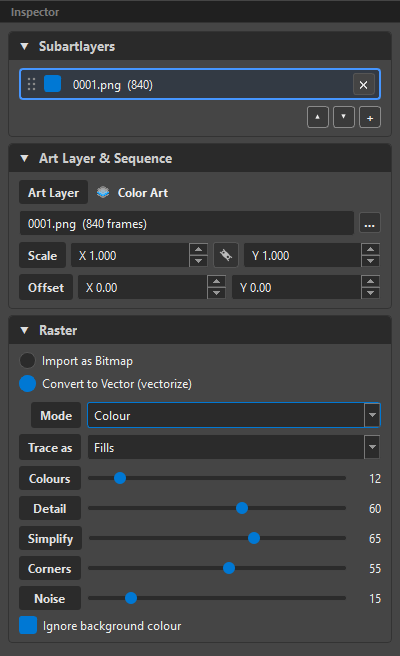
- Subartlayers — the same track stack as a vector art layer; the row icon says bitmap.
- Art Layer & Sequence — art layer, sequence, Scale / Offset.
- Content type — Import as Bitmap or Convert to Vector (vectorize).
- Trace controls — Mode, Trace as, Colours, Detail, Simplify, Corners, Noise, Ignore background colour. See Trace Modes.
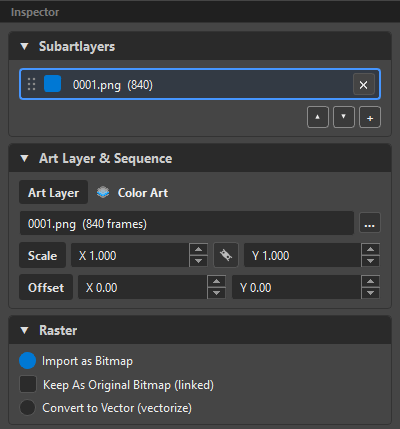
Choosing Import as Bitmap collapses the trace controls away — the sequence imports as-is, or Keep As Original Bitmap (linked) links it without copying:
The cards
Each card collapses with the little ▾ so you can focus on one group at a time.
| Card | What it does |
|---|---|
| Drawing | the node's name and target, start / range, Mode (Art Layers / Original Bitmap), Bypass, and the Palette with its colours |
| Subartlayers | the track stack — add / reorder / remove passes on this art layer |
| Art Layer & Sequence | pick the art layer, the sequence, and the art-layer Scale / Offset |
| Stroke Thickness | the whole width + cleanup model for vector line art |
| Tip Taper | non-destructive shaping of the free stroke ends |
| Trace (raster) | Potrace mode + parameters |
| Peg / Group / Composite | the structural nodes emitted around the drawing |
Per-subartlayer settings
Thickness, taper, merge, and the transform are stored per track, so two passes on the same Line Art layer can have different width, taper, or scale.