Quick Start
A first scene, from an empty Node View to an assembled hierarchy. Ten minutes, and nothing is written to Harmony until the last step.
1. Set up your destinations
In the Browser, find the Magnets section and press +. Create the destinations your show uses:
| Magnet Name | Aliases |
|---|---|
BACKGROUND |
bg, backgrounds |
CHARACTER |
char, characters |
PROPS |
prop |
EFFECTS |
fx |
You do this once. From now on a folder called bg lands under BACKGROUND by itself, in every scene.
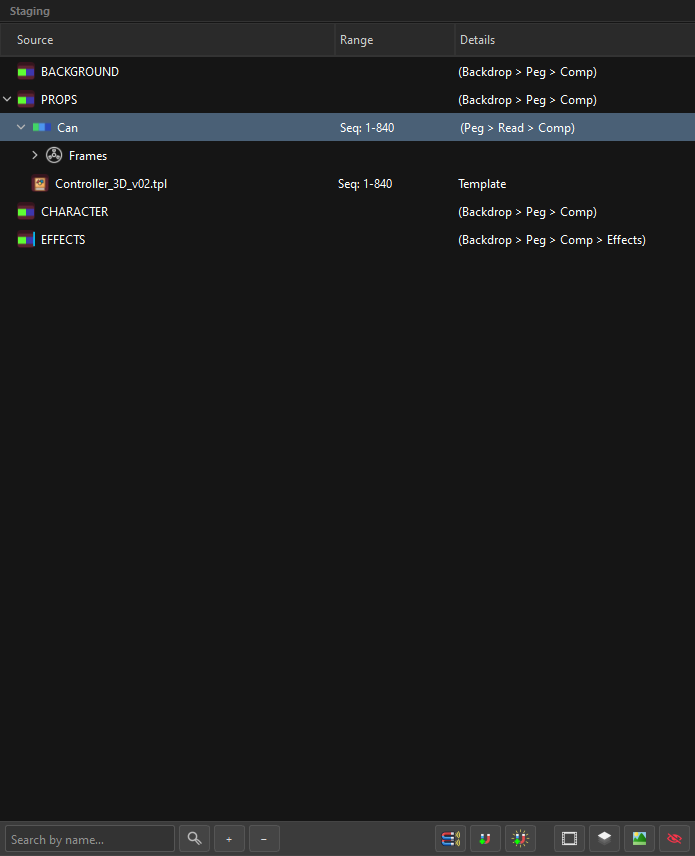
Then press  Generate Magnet Tree (Ctrl+M) in the Staging toolbar. The four destinations appear, each already a super node:
2. Bring artwork in
Navigate to your delivery folder and drag it into Staging.
What happens on the way in:
- subfolders become branches,
- numbered files collapse into sequences with their frame range detected,
- folder names are read for tags,
- anything matching a magnet is routed to its destination.
Read the Details column. It already tells you what will be built:
Can Seq: 1-840 (Peg > Read > Comp)
3. Shape it
Select a row and use the Inspector.
Tick a component to add it — Peg, Group, Composite, Backdrop. Or press the shortcut: Ctrl+Shift+P attaches a peg to the selection, Ctrl+Shift+N attaches the whole set.
Aim the artwork. On a drawing, set Target Layer to the art layer the artwork belongs on — or tag it at the source next time (line=LA).
Add an effect. Ctrl+1 for Transparency, Ctrl+4 for Glow. The chain order is the wiring order.
The fastest edit is the one you don't make
Everything in this step can be written into the file names before the import. head=P-G-C in Photoshop is three nodes you never had to tick. See Tags.
4. Check the frames
Expand a drawing to see its Frames folder. The Range column reports the truth:
| Shows | Means |
|---|---|
Seq: 1-840 |
continuous |
Seq: 1-12, 20-24 |
a gap — worth knowing about now, not at render |
Empty |
no artwork yet |
Hide them all with the  toggle when you go back to structure.
5. Assemble
Press Assemble.
If the button is grey, the feedback bar is showing a red blocker — that bar is the answer to why.
OSA creates every node, connects both hierarchies, writes the attributes, imports the artwork, and lays the graph out on the Wide Bus grid.
Then read the report. It lists what the scene refused, not what it did:
| Mark | Means |
|---|---|
| FALHA | asked for and did not happen |
| nota | happened, just not the way it was asked |
Silence is the good outcome.
What to read next
-
Write structure into names
Tags — the highest-leverage habit in the tool.
-
Get artwork on the right layer
Drawings, Art Layers & Subart — and why a container keeps its own artwork.
-
Keep the Node View readable
-
Fix a tree you inherited
Split & Merge — break apart, correct, put back.