Quick Start
The shortest complete round trip: one control, a handful of poses, one Compose. Everything here is expanded in the guides — this is the shape of the workflow, not the reference.
If a word here is unfamiliar, read Concepts & Vocabulary first. It is twenty minutes that make the rest obvious.
1. Open ORC on your character
Open your rigged scene in Harmony, then launch Octo Rig Composer.
The window is three columns: Outliner (the rig) on the right, Editor (what you author) in the middle, Navigator (where you are standing) on the left. See Interface Overview.
Nothing you do touches your scene until you press Compose.
2. Give the head control a face
The Outliner starts with one control called Head. A control is a turnaround holder: it carries a Front face and, optionally, a Back face, and everything below it keys across whichever is active.
Select Head. In the Editor, click Set Front and choose New Layer.
You now have a 5 × 3 grid — fifteen head poses waiting to be authored. Change the shape with the Grid dropdown if you want something else; Custom… goes up to 32 × 32.
Front alone is fine
Add a Back face later if you need a full turnaround. You are not committing to one now.
3. Tell it what to move
With the face selected, look at the Targets list at the bottom of the Editor.
- Select the nodes in Harmony's Node View that this control should drive — the head peg, the deformation groups, the drawings.
- Click
+in the Targets toolbar.
They appear in the list, nested the way they are nested in Harmony. That is all a target is: a node this layer is allowed to move.
See Targets.
4. Pose, then stamp the frame
This is the part that is different from most rigging tools, and the part worth understanding.
ORC does not record your pose. It records the frame your pose is on.
So the loop is:
- Click a snap in the Editor's grid — say
R1C3. - Go to an empty frame on Harmony's timeline.
- Pose the character there with Harmony's own tools: deformers, pegs, drawing substitutions, whatever you normally use.
- With the cursor over ORC's grid, press F6.
The snap turns green and shows that frame number. Repeat for every snap you care about.
Why a frame reference and not a pose
Because you can go back to frame 861, nudge the eyebrow, re-compose, and the rig picks the change up. Nothing is baked until Compose reads it.
Useful while you do this:
- Left-click a navigator snap moves you without disturbing the timeline; middle-click moves you and jumps the timeline to that snap's frame.
- Double-click a snap to type an exact frame number.
- Drag the small blue grip at the edge of a selection to autofill a run of frames — hold Alt to count down, Ctrl to repeat the same frame.
- Turn on the auto-capture dot in the address bar and ORC stamps the frame for you as you move onto empty snaps.
See Keying & Auto-Capture and Grids & Snaps.
5. Add a pose layer or two
A pose layer is a second set of poses that keys across the control — eyebrows that have their own 3 × 3 grid at every one of the head's fifteen poses.
Right-click Head → + Add Pose Layer, name it, give it a grid and its own targets, and author it the same way.
The Navigator on the left now shows the head's grid while you author the eyebrows: move there, pose, F6. That is what "keys across" means, and it is the whole idea.
See Pose Layers.
6. Compose
Type a name in MC Name — Head is enough, ORC appends -MC when you press Enter.
If Compose is greyed out, hover it: the tooltip is the reason, and it is always something you can act on ("this layer has no keys yet", "this layer is keyed but has no targets").
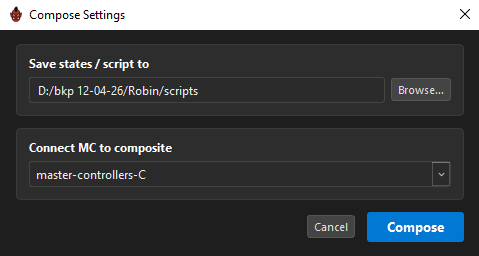
Press Enter again, or click Compose. Pick where to save the state files and which composite the MC connects to, then confirm.
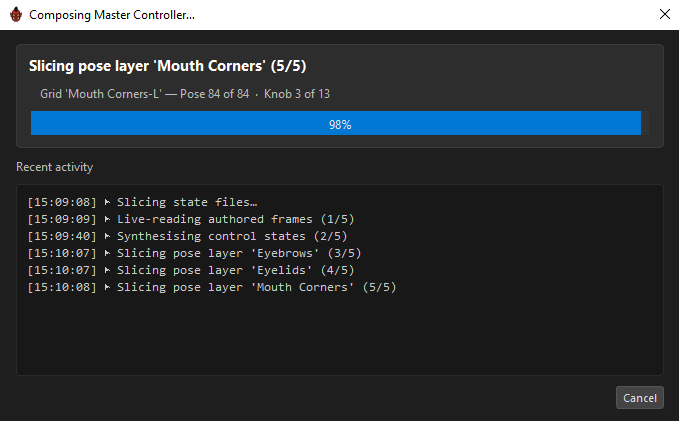
A progress dialog reports what it is doing — reading your authored frames, synthesising states, slicing each pose layer.
When it finishes, your Master Controller is in the scene. Open the Camera View, show the MC's controls, and drag.
See Compose.
7. Keep going
You have a working rig. What is normally next:
| Want to… | Read |
|---|---|
| Give the head a turnaround | Controls — the Back face and Share Sides |
| Add an extra axis to a layer | Knobs |
| Author left and right separately | Pages, Pairs & Sides |
| Add a slider, checkbox or 2-D pad | Drivers |
| Make the eyes track a target | Look-At |
| Group widgets and hide things | Visibility Groups |
| Lay the widgets over your character | Widget Editor |
| Reuse this setup on the next character | Character & Config Presets |
Re-opening later
Close ORC and come back tomorrow: select the composed MC in the Node View and use + → Import MC, and your grids, frames and targets come back with it. ORC also autosaves your session and offers to restore it. See Re-editing a Composed MC.